Channels
- Home
- >
- Channels
Getting started with Channel
Channel is where you connect and manage the WhatsApp numbers your workspace sends from.
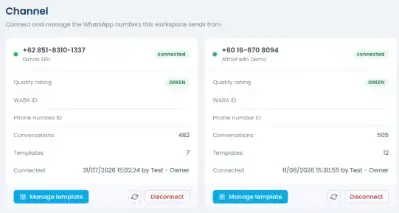
If no number is connected yet, you’ll see an empty state prompting you to connect one. Once connected, each number shows as a card with:
Its Quality rating (Green, Yellow, or Red)
Its WABA ID and Phone number ID
How many Conversations and Templates it has
When it was connected, and by whom
From each card, you can Manage template, Refresh its data, or Disconnect the number.
Connecting a channel
Click + Connect a number. You’ll see two options:
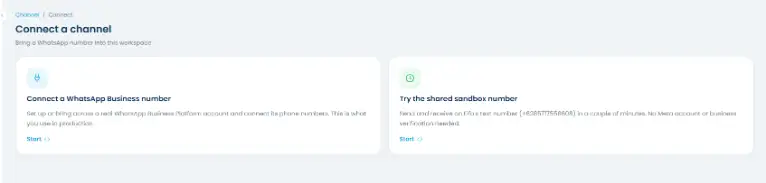
Connect a WhatsApp Business number: set up or bring across a real WhatsApp Business Platform account. This is what you’ll use in production.
Try the shared sandbox number: send and receive on Elfo’s test number in a couple of minutes. No Meta account or business verification needed, useful for exploring the platform before you connect your own number.
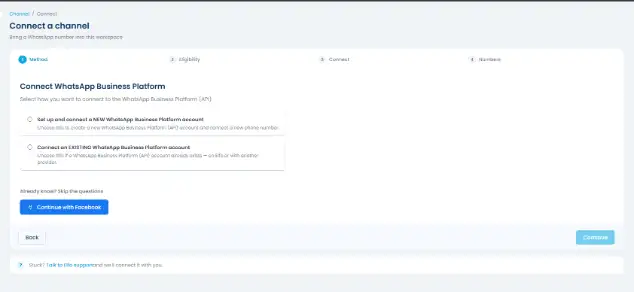
Step 1: Choose your method
If you choose to connect a real number, pick whether you’re setting up a NEW WhatsApp Business Platform account or connecting an EXISTING one, or skip straight to Continue with Facebook if you already know what you’re doing.
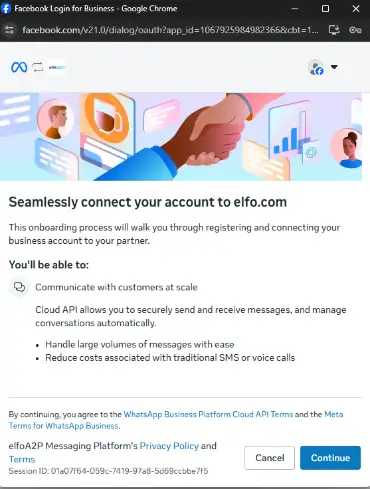
Step 2: Authorize with Facebook
This opens Meta’s own login and consent screen, where you authorize elfo to manage your WhatsApp assets.
Step 3: Add your number
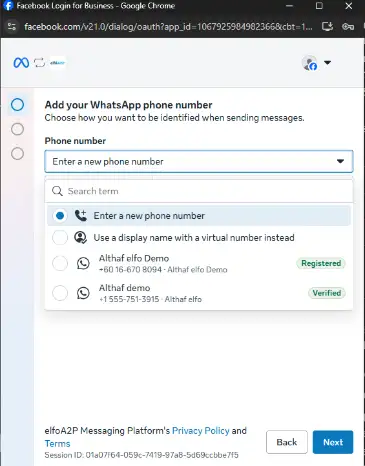
Meta walks you through adding your phone number, either entering a new number or selecting one already registered to your Business Portfolio.
Creating a template
Click + Add New Template.
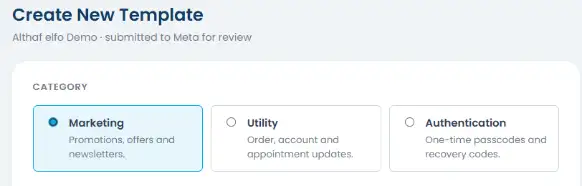
Step 1: Choose a category
Pick Marketing, Utility, or Authentication. This changes what the rest of the form looks like, so choose the one that matches the message you’re sending.
Step 2: Fill in the content
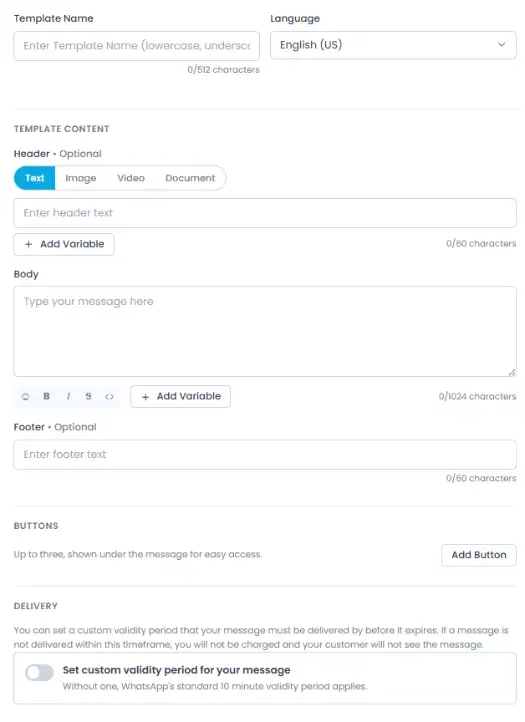
Regardless of category (except Authentication, which has fixed content, see below), you’ll fill in:
Template Name: what identifies this template internally. Use lowercase letters and underscores (e.g. order_voucher_v3), this can’t be changed once submitted.
Language: the language you’re writing the message in. Meta reviews the template against this language.
Header (optional): the top of your message. Choose Text (a short line, up to 60 characters), or attach an Image, Video, or Document instead.
Body: the main message content, up to 1024 characters. Use B, I, S for bold, italic, and strikethrough, and click + Add Variable to insert a placeholder (e.g. {{1}}) that gets filled in per recipient when you send a broadcast.
Footer (optional): a small line of text below the body, up to 60 characters. Can’t contain variables.
Marketing
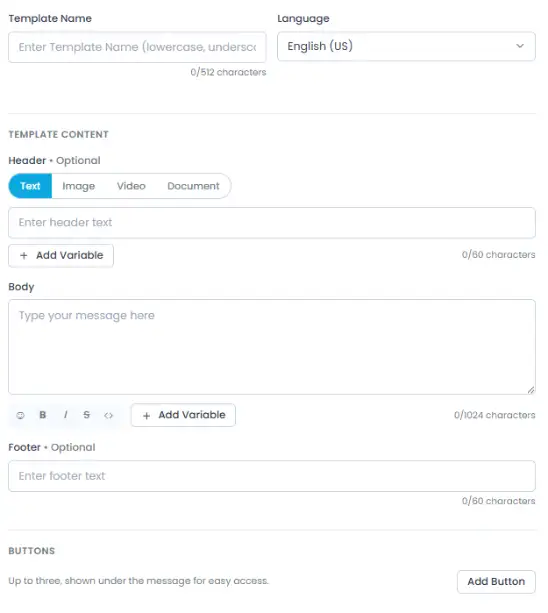
Up to 3 buttons:
| Button | What it does | Notes |
| Marketing Opt-Out | A link contacts can tap to stop receiving marketing messages | Recommended for compliance |
| Visit Website | Links out to a URL | 2 button maximum |
| Call Phone Number | Lets contacts tap to call you | 1 button maximum |
| Copy Offer Code | Lets contacts copy a promo code with one tap | 1 button maximum |
Utility
| Button | What it does | Notes |
| Visit Website | Links out to a URL | 2 button maximum |
| Call Phone Number | Lets contacts tap to call you | 1 button maximum |
| Quick Reply | A simple button contacts can tap to send back a predefined response | – |
A Delivery section lets you set a custom validity period your message must be delivered within before it expires. Without one, WhatsApp’s standard 10-minute validity period applies. it.
If a message isn’t delivered in time, you won’t be charged and the customer won’t see
Authentication
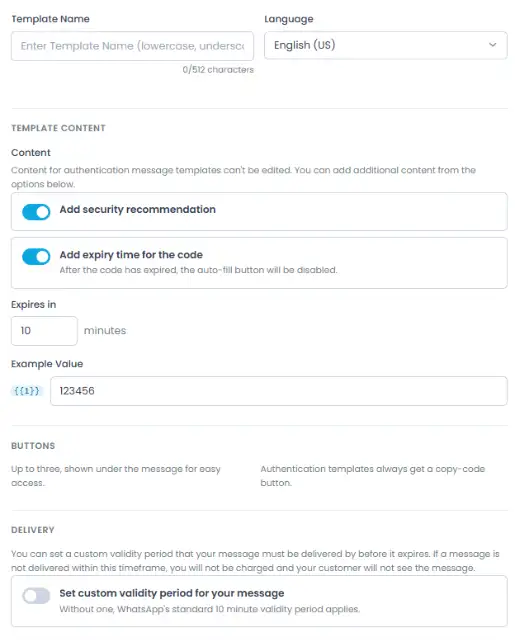
Authentication (one-time passcodes and recovery codes)
Content isn’t freely editable here, it’s a fixed OTP format. You can toggle Add security recommendation and Add expiry time for the code (with an editable expiry duration in minutes), and set an Example Value for the code placeholder.
Authentication templates always get a copy-code button automatically (lets contacts copy the code with one tap), there’s no manual button configuration.
Also includes the same Delivery custom validity period option as Utility.
Step 3: Review the preview
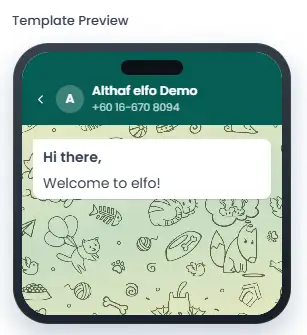
A live Template Preview on the right shows exactly how the message will look on WhatsApp as you build it. Check it matches what you intend to send, then submit, this sends the template to Meta for review.
Step 4: Submit
Click Create Template to send it to Meta for review. Its status starts as Pending, once Meta makes a decision, it changes to Approved or Rejected.
Review usually takes anywhere from a few hours up to 48 hours, and you can check the status anytime from the template list under Manage template.
A template only becomes usable in a broadcast once it’s Approved.
Managing templates
Click Manage template on a channel’s card to see every template submitted for that number.
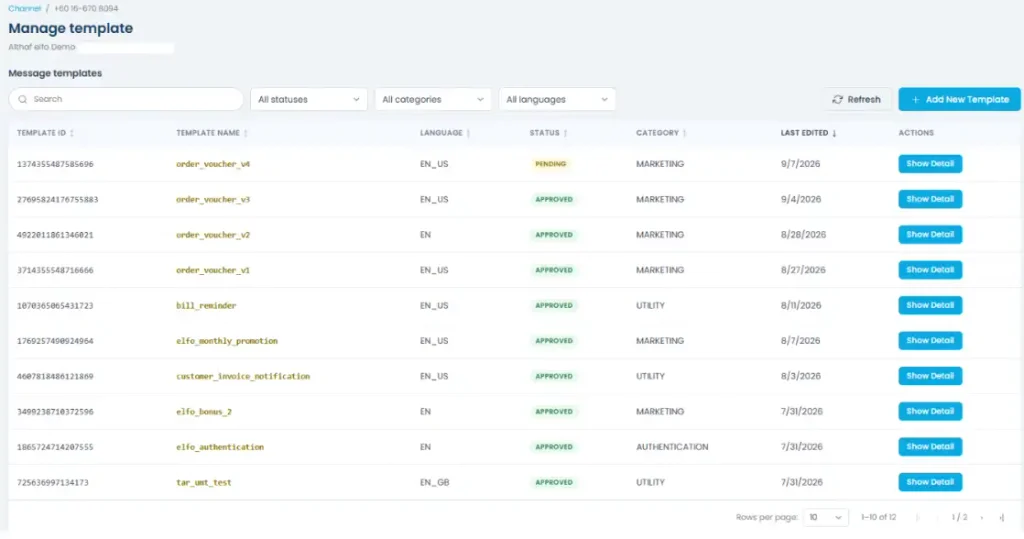
You can:
Search by name, or filter by Status, Category, or Language
Sort any column (Template ID, Template Name, Language, Status, Category, Last Edited)
Refresh to sync the latest status from Meta
Last Edited shows when the template was first submitted, or, if it’s been edited since, the date of the most recent edit.
Click Show Detail on any template to see its full content and preview.
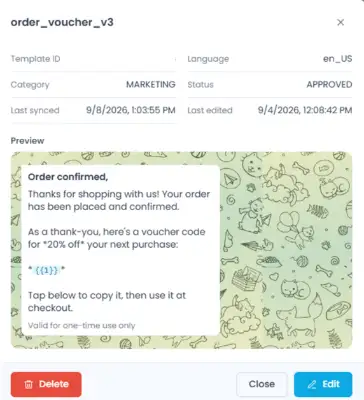
Editing a template
Editing is only available for Approved and Rejected templates. While a template is Pending, you can’t edit it until Meta makes a decision on the current version.
To do it: Click Show Detail and click Edit button there.
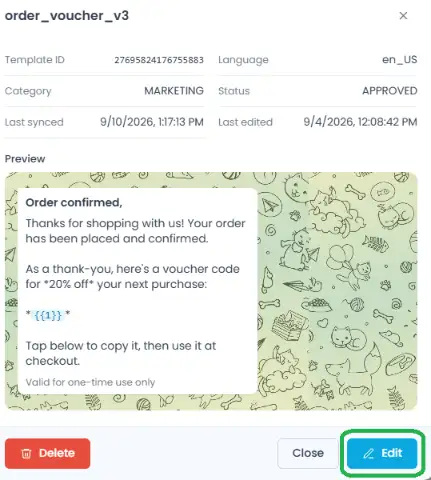
The edit form is prefilled with the template’s current content. Template Name, Language, and Category stay locked, since Meta ties the template’s identity to these and they can’t be changed after creation.
Everything else (Header, Body, Footer, Buttons, and Delivery settings) is editable.
Saving your changes resubmits the template to Meta for review. Its status changes to Pending until Meta makes a decision, and it won’t be usable in broadcasts until then.