Broadcast
- Home
- >
- Broadcast
Getting started with Broadcast
Broadcast is where you send an approved message template to a segment or a list of contacts.
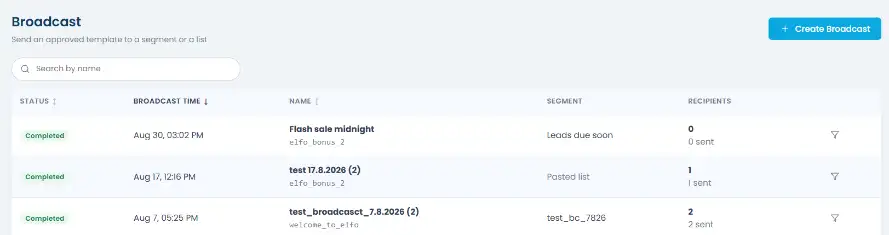
The Broadcast page lists every broadcast you’ve sent, scheduled, or saved as a draft, with its status, broadcast time, name, segment, and recipient count.
Use the search bar to find a broadcast by name, and click any column header (Status, Broadcast Time, Name) to sort the list. Broadcast Time is sorted newest first by default.
Creating a broadcast
Click + Create Broadcast.
Step 1: Name it and pick your audience
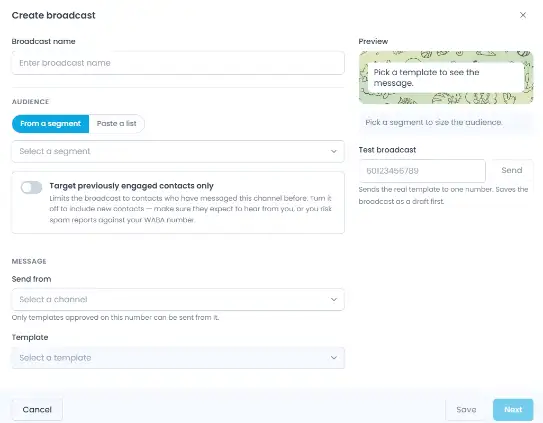
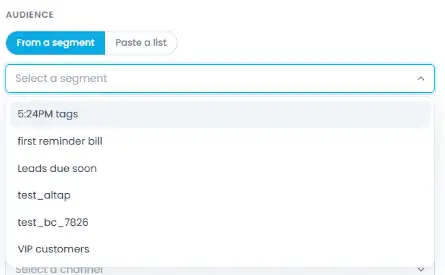
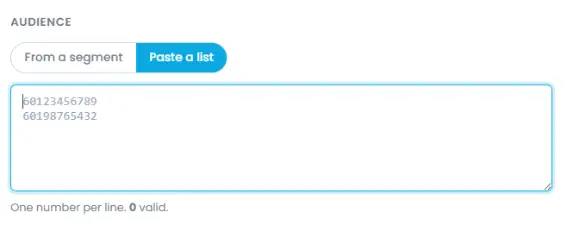
Name your broadcast, then choose your audience: either From a segment (pick one of your saved segments) or Paste a list (paste numbers directly).
Step 2: Set your targeting
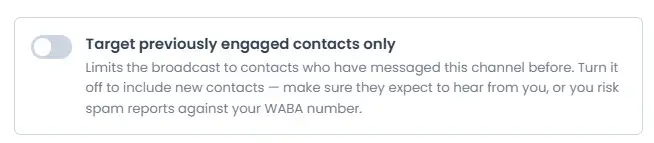
Optionally toggle Target previously engaged contacts only to limit the send to contacts who’ve already messaged this channel.
Turning this off includes new contacts too, only do this if they already expect to hear from you, since messaging people who haven’t opted in risks spam reports against your WABA number.
Step 3: Choose your message
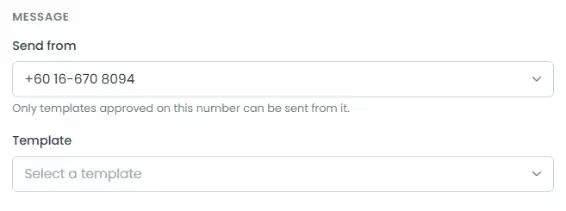
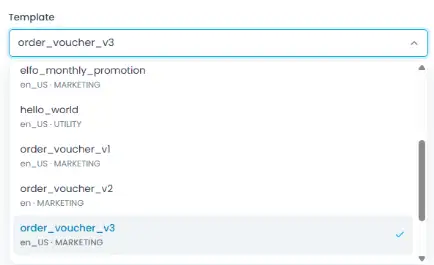
Under Message, pick Send from (the channel to send from) and a Template. Only templates approved for that channel show up here.
Step 4: Fill in the placeholders
Templates often include placeholders, spots in the message that get replaced with something specific to each recipient, like their name or a voucher code. These show up as {{1}}, {{2}}, and so on in the template text.
For example, the order_voucher_v3 template reads:
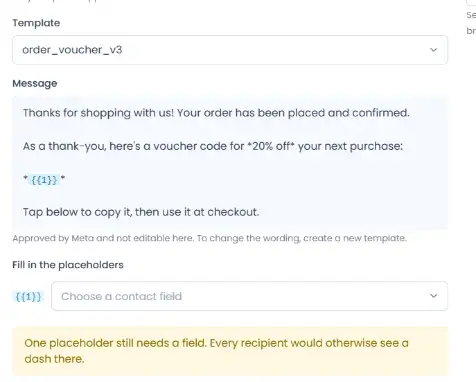
Here, {{1}} is mapped to a Voucher Code contact field. Each recipient then sees their own voucher code in place of {{1}} when the message is sent.
Under Fill in the placeholders, choose which contact field feeds each numbered placeholder ({{1}}, {{2}}, and so on) in your template. Every placeholder needs a field mapped to it, if one is left unmapped, recipients see a dash where that content should be.
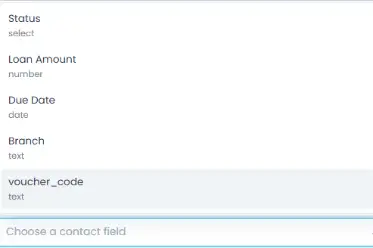

The Preview panel on the right shows exactly what recipients will see, and updates as you fill things in.
Step 5: Test and send
Optionally send a Test broadcast to one number, this sends the real template to that number and saves the broadcast as a draft first. The modal stays open on the same screen, so you can keep editing.
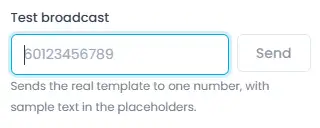
From here:
Click Save to save the broadcast as a Draft, to come back to later.
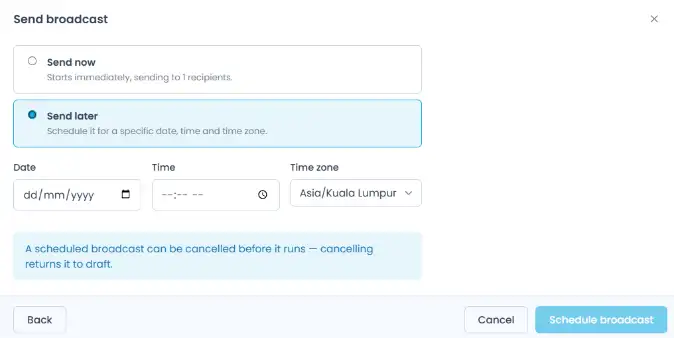
Click Next to continue, where you’ll choose between Send now
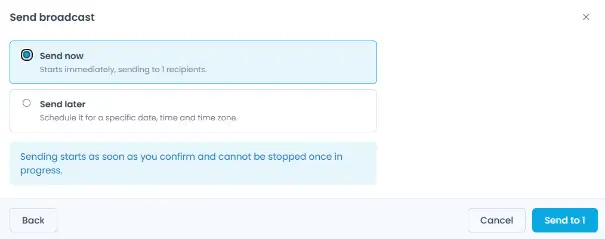
or Send later.
Broadcast statuses
| Status | What it means | Available Actions |
| Draft | Saved but not sent yet | Send now, Clone, Continue editing, Delete |
| Scheduled | Set to send at a future time | Clone, Cancel (reverts it to Draft) |
| In Progress | Currently sending | Clone |
| Completed | Finished sending | Clone, View Details |
| Failed | Failed to send | Clone, View Details |
Viewing broadcast details
Click a broadcast to open its details.
Completed
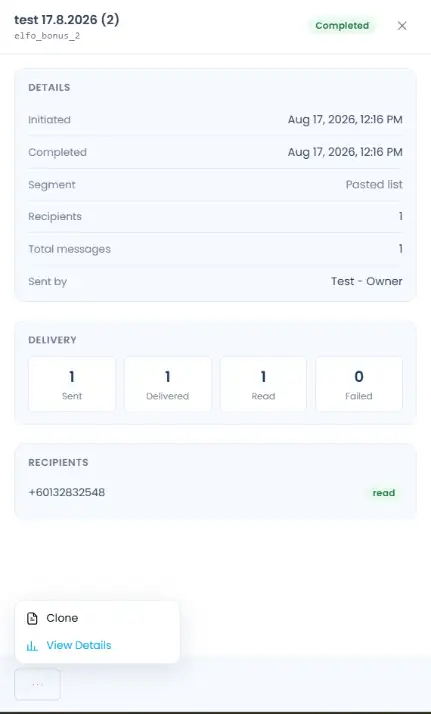
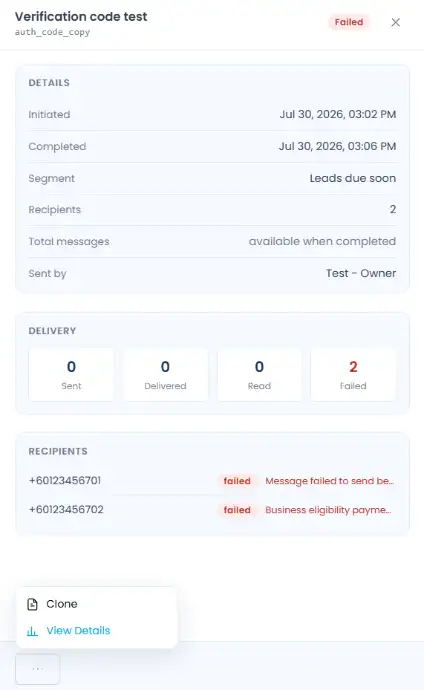
Details: when it was initiated and completed, the segment used, recipient count, total messages, and who sent it.
Delivery: a breakdown of Sent, Delivered, Read, and Failed counts.
Recipients: every number the broadcast went to, with its individual status.
Draft
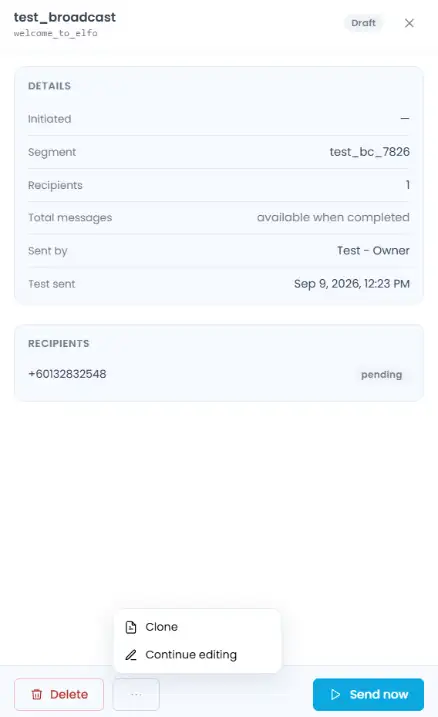
Drafts show the same Details section, but with Total messages marked as “available when completed”, plus quick access to Send now or Continue editing right from the detail view.
Failed broadcasts
For a failed broadcast, the Recipients list shows the failure reason next to each number, so you can see exactly what went wrong.